Samstag, 12. März 2011

Evaluation Module 1

Evaluation of my work in Module 1- cross and star shapes:
I have choosen my colour sheme in yellow and violet. I started in september 2010 and finished in februar 2011. In the meantime I spent many hours for reading, writing and made fotos (for my blog). The real workingtime was not so much, about 65 hours for design, stitching and cut out. I have used about 10 hours for paper painting and bonding the fabrics which I have used them. This was a fine time. To work with my computer (blog loading) and writing I was not so happy with it.
After I have finished my work, I have I detected, that I did not make fotos during my working time to show the different stages of my work.
I am happy with my last work in Chapter 1, because I have used all my cut out shapes, which I have had. I layed these shapes together untill I was happy with the results. So I did not have left overs. If I had to do this work again, I should try to make it in another wise, because I think  there exist many other ways to come to similar beautiful  result. At the beginning it was not clear for me to documentate the steps so precisely as necessary.

Mudule 1, Chapter 12, image 3 and 4

Joan Miro was born in 1893. When he was a child he got lessons in drawing. He lived in Spain and France. He worked with luminous colours. He worked with the colours: black, green, yellow, blue and red. Through his work he was engaged with three figures: a red circle, the moon and the star. You can find these forms nearly in all his pictures. Characteristic for his work are pictures with mysterious and ironical contents. He used animal forms and twisted them with other geometrical figures.

Module 1, Chapter 12, image 1 and 2

Wassily Kandinsky was a Russian painter and lived in different cities in Western Europe. In 1911 in Munich he founded with three other painters a group called  Blue Rider. In this time he was the founder ao abstract painting.

Module 1, chapter 12

I have found an illustration of an example of Mola embroidery. The image shows a Mola from a book written by Friederike Kohlhaussen. Mola is a technic used by the Kuna-Indians for their blouses. It is a very famous technic and very old. This people lived in Columbia and Panama.

Sonntag, 6. Februar 2011

M 1, chapter 11, image 21 and 22


Image 21 is the resolved paper design based on growth and disintegration. Image 22 is the resolved design. The background is a batikfabric. The violet silk is the negativ starshape,witch I have cut through, the bigger part is bonded to the right uppersite. The other part (little) is bonded at the bottom left. The big (free cut) star is painted Tyvek witch I have machine stitched. Then I used a hot tool. The surfaces was than covered with little frayed yellow squares and cross shapes. The whole piece was then stitched by hand in straight-and sorbello stitch. I have chosen  the sorbello stitch,  becouse it looks like a cross.

M 1, chapter 11, image 17, 18, 19 and 20


The images 17, 18 and 19 show paper stars,. wich are build up a pattern with smaller and big star shapes. Image 20 is the resolved one. The background is my printed and dyed fabric. Then I stitched with yellow yarn free hand- machine big star shapes. The second layer  is  made from bonded fabric, used positive and negative shape.

M1, chapter 11, image 15 and 16 and worksheets for the last textile sample.

These images show two different ways of disintegrating or grow star shapes by using machine stitchery and hand stitchery. the two worksheets, one from paper and one from painted paper and fabric, are samples for the last textile samples and show the starshape which I shall use in postive and negative form in large and small. I played with these shapes and layes them in different postions to each other.

M1, chapter 11, image 14

This image image shows the different ways of disintegrating sqares of frayed fabric.

M1, chapter 11, image 11

Here are different ways to manipulate paper.

M1, chapter 10, worksheets and image 9 and 10


This is my positive and negative swapped shapes. I have used three different star shapes (image 10). The felt is a bonded fabric. I bonded  a handycraft felt with a hand dyed commercial needle punched felt.

M1, chapter 10, image 8 and the worksheet


This is my counter-interchange sample.

Although from this star shape I have made a paper sample. I have used the shape from chapter three the subdivided star shape.

M1, chapter 10, image 6 and 7


Image 6 is my simple  counterchange star shapefrom my painted paper and image 7 is the same shape made of fabric. I have used a simple insertion stitch.

M1, chapter 10, image 5

This foto shows my sample with different insertion stitches (hand and machine).

M1, chapter 9, image 4

The upper starshape is made in chenille technic. The star beneath is a multicoloured ripple effect. I have stitched all the febriclayers together and then i cut them out more or less in the different layers.

M1, chapter 9, image 3

Here are two starshapes. One is stitched inside, the second is stitched outside and they are cut out.. I have used in both samples the same fabrics. The fabrics can you see on thr right side of the image.

M1,chapter 9, image 2 and the worksheet

This is a traditional starshape in Mola technic.

I made a paper sample before I started with the textile one.

Module 1, chapter 9, image 1

This image shows a part of my used yarns, the most of them are hand dyed

Samstag, 1. Januar 2011

Module 1, Chapter 8, image 6

This block was made of left over shapes; the first layer is a bonded yellow organza; the second is a yellow star shape with straight machine stitches; the third layer is a dark violet star shape with zig zag machine stitches; the fourth layer is a light violet star shape done by free hand machine stitching; afterwards I stitched by machine once around the whole shape.

Module 1, Chapter 8, image 5

The bachground is a decorative fabric; the center is padded from the back; the scond layer is a thin violet silk layer hand stitched; the third layer is a bonded yellow organza straight stitched by hand.

Module 1, Chapter 8, image 4

The background is a decorative needle felted fabric; the second layer is a printed and stitched fabric, the center was a little padded from the back and the stitches are small and big fly stitches.

Module 1, Chapter 8, image 3

Background is a cotton, which I stitched a star shape with machine; the second layer is a cotton  star shape hand stitched; the third layer is a bonded organza star machine stitched, the center is padded and hand stitched.

Module 1, Chapter 8, image 2

Background is a silk dyed fabric; the second layer is a cotton layer free hand machine stitched; than I stemped my shape and stitch in straight stitch four times.

Module 1, Chapter 8, image 1 and worksheet image

The background fabric is a yellow cotton; the second layer is a yellow square machine stitched; the third layer is a star shape; outer lines are hand stitches; the central shape is padded from the back and than I stitched a yarn around.
On this worksheet image you see all my star samples for chapter  8 on paper.

Module 1, Chapter 7, image 6

The first layer is a dyed and printed cotton; second layer is an angelina hand stitched; third layer is a two layer bonded yellow organza hand stitched; fourth layer is a bonded organza stitched with knots.

Module 1, Chapter 7, image 5

First layer is a silk fabric; the second layer is my needle felted organza with hand stitches; the third layer is my bonded fabric stitched by hand and the fourth layer is bonded organza with snipped wool als stitched by hand; the four V-shapes are left over and stitched by machine.

Module 1, Chapter 7, image 4

First layer: yellow dyed and stemped cotton; second layer is my bonded violet fabric stitched in chain stitch; third layeris my yellow deyed silk stitched  straight and embraced; fourth layer is my yellow bonded fabric with chain stitch.

Module 1, Chapter 7, image 3

First layer is a violet fabric, the second layer is a bonded selfmade fabric (sizoflor, organza) and I stitched them on the outer line by machine two times, once in violet and the next in gold.; the tird layer is my yellow bonded fabric also stitched by machine and hand in different ways.

Module 1, Chapter 7, image 2

First layer I have used dyed yellow silk; the second layer is yellow cotton and is hand stitched; the third layer is deyed violet silk and hand stitched with different stitches.

Module1, Chapter 7, image 1a and 1b and worksheet image


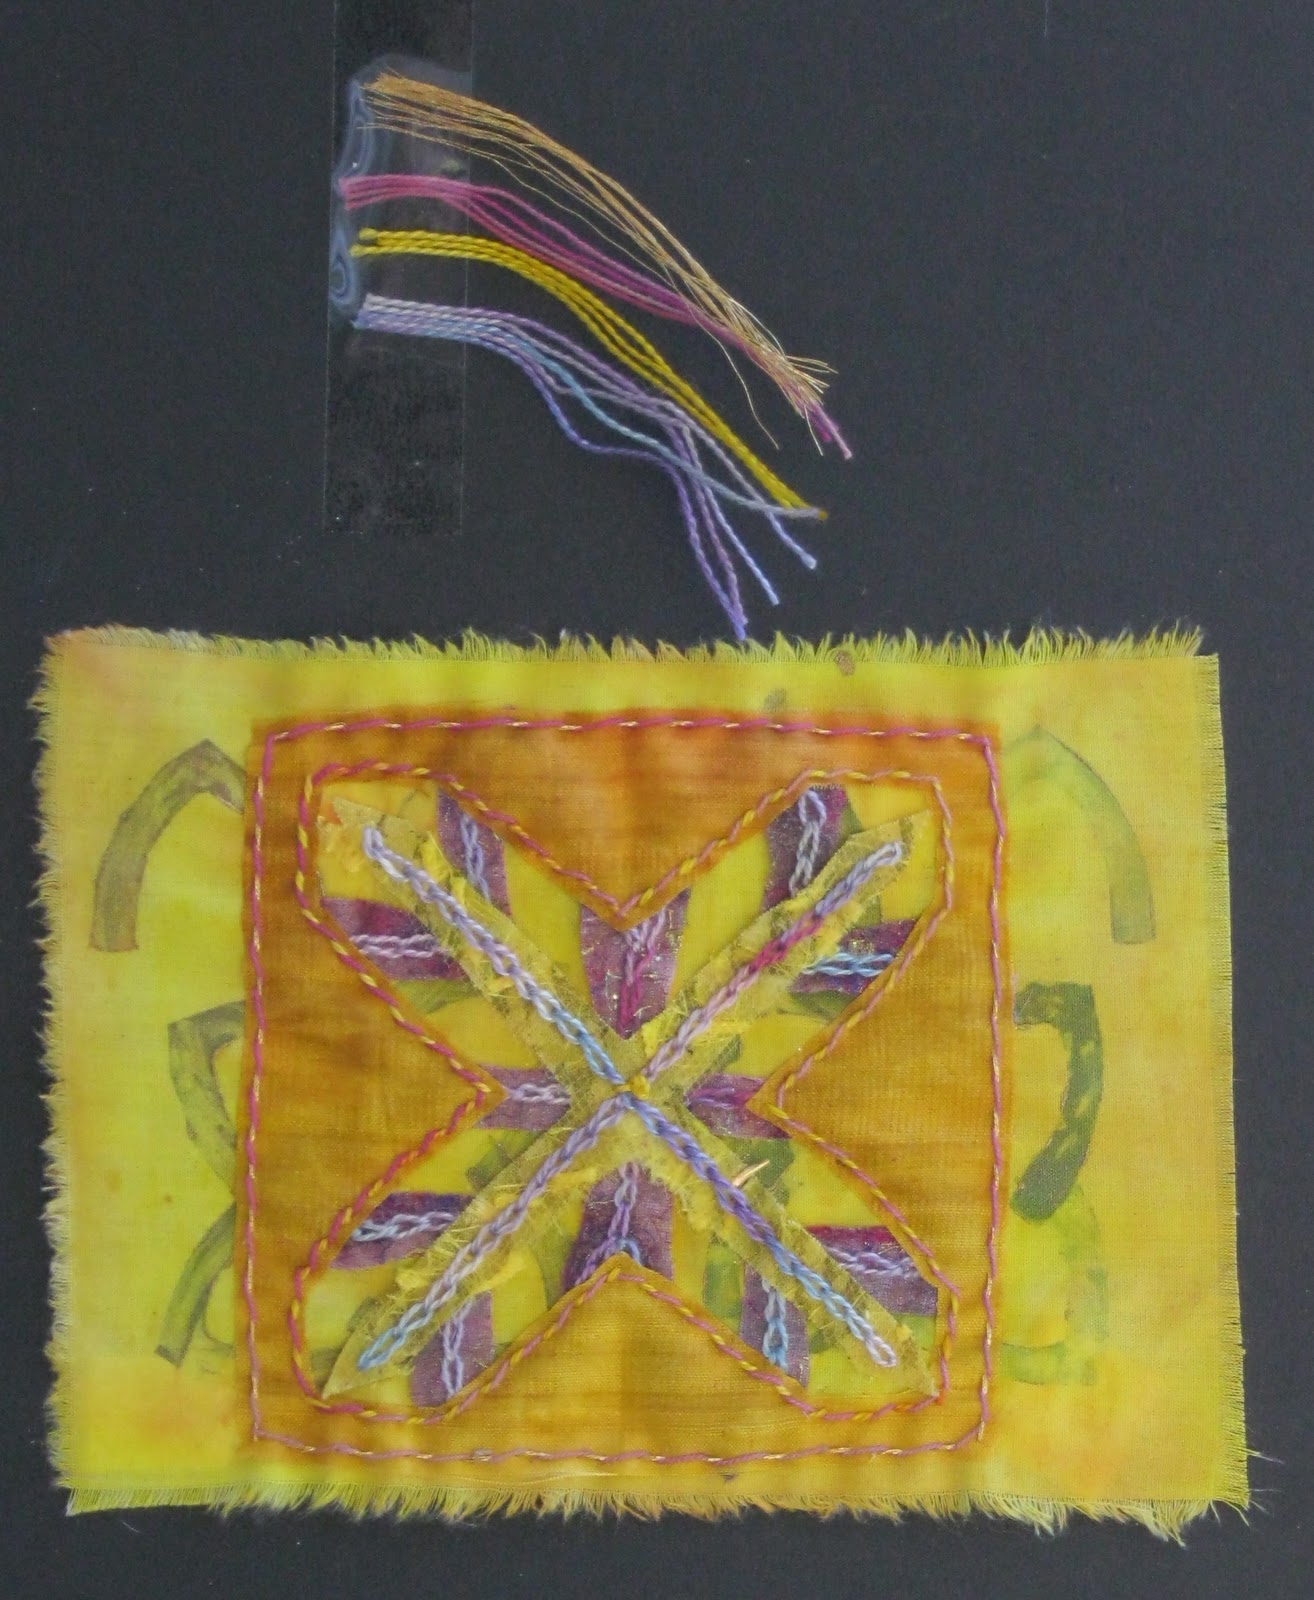
I show the threads, which I have used, on the upper site of my stitched blocks. First layer is my yellow bonded fabric; Second layer  I have used a yellow cotton, I stitched by hand with right stitches in double
 row. the third layer consists of violet silk and is also stitches by hand in different stitches.


The image 1b shows a fabric collage. I used this fabrics in chapter 7 and 8

The worksheet image shows all my following star samples, which I made from paper.