The following 6 pictures are variations of my design of picture 80, 81and 82 composed by Photoshop Elements with different filters. I find all of them interesting. My favorite is the design of picture 88.
I elongated sideways and lengthways of the original design to get the measures for my wall hanging.


Picture 88 is my wall hanging design.

Picture 89:
My manipulated fabric technics for my wall hanging. I used synthetic silk, stitched with pearl yarn in the bobbin in meandering and whip stitch. The layer underneath is crash fleece. On this picture can you see the difference before and after ironing. This is my translation from the brown paper strips.
Fabric B:

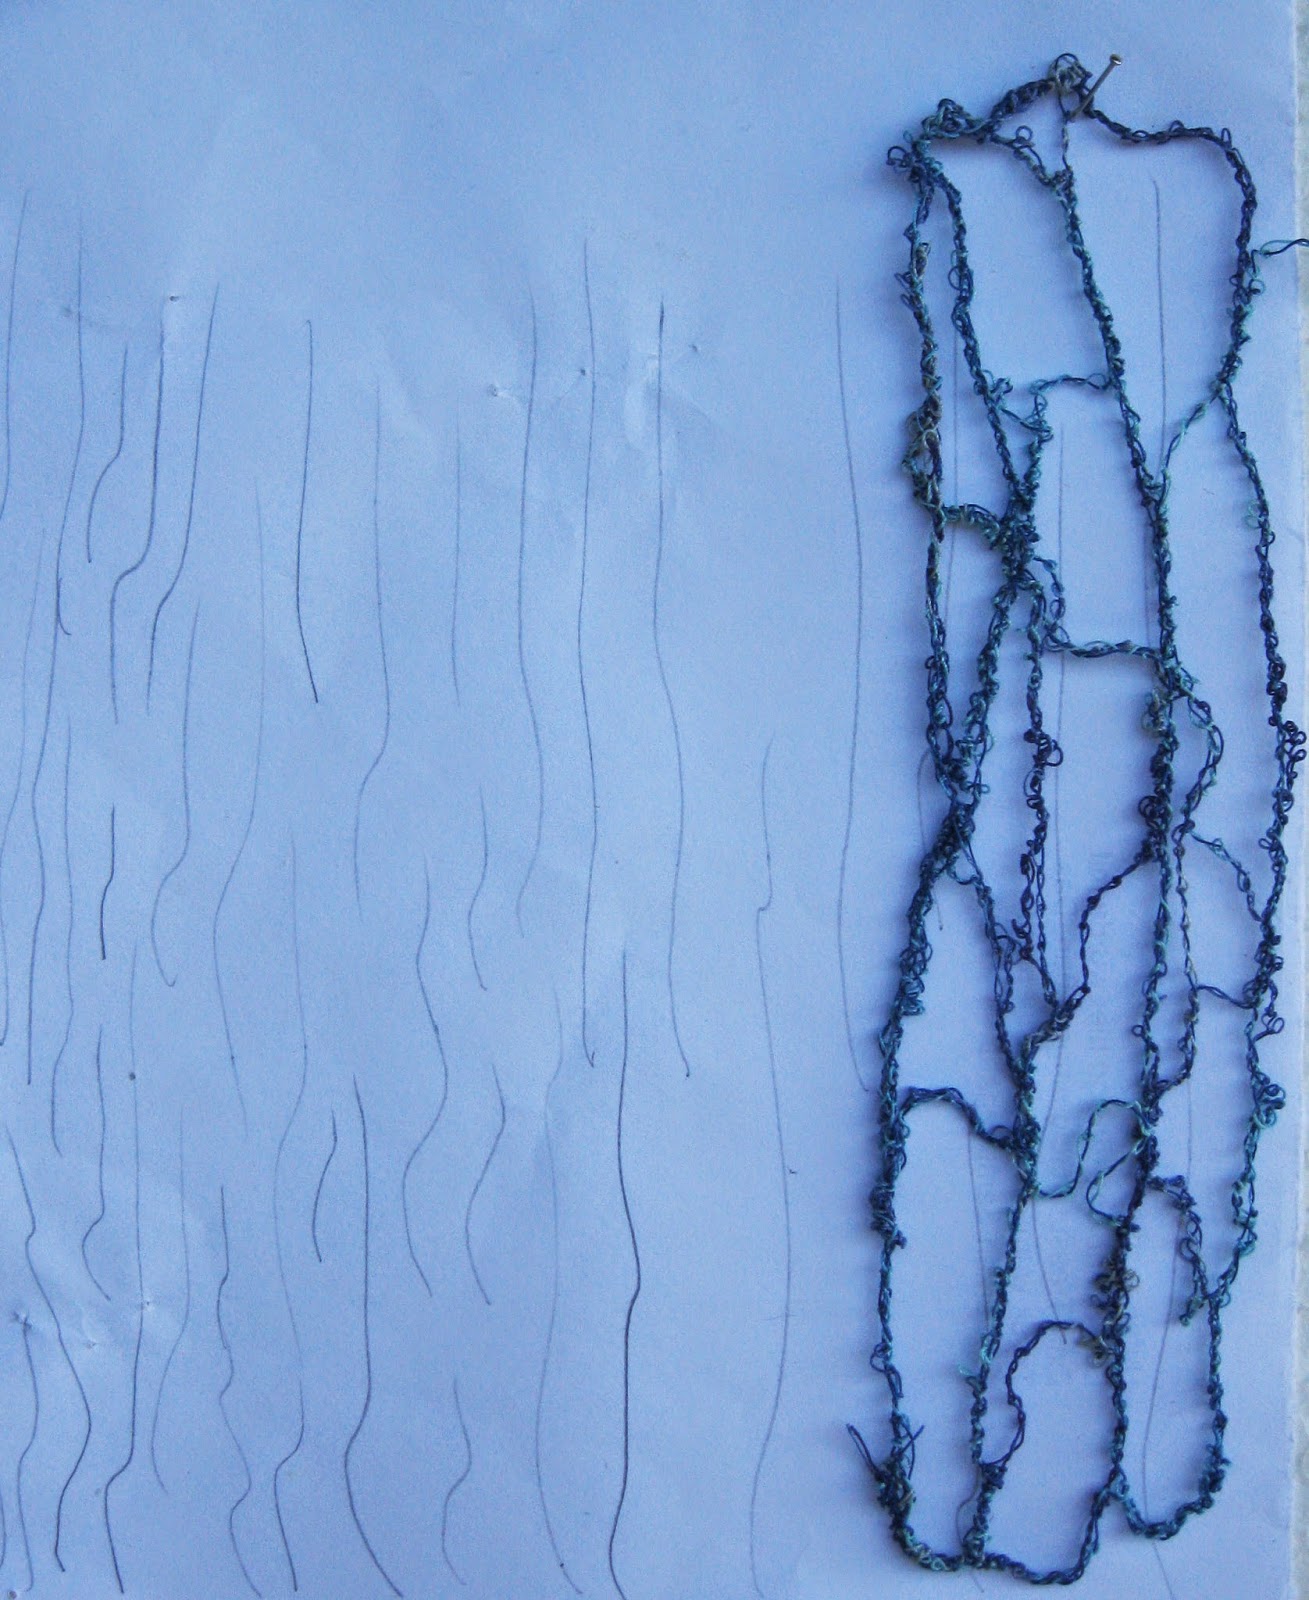
Picture 90:This is my translation of my blue paper strips. I have dyed cotton in blue and green (the second layer) the first is silver aluminium foil. I have created lakes with zig-zag stitch and cut the cotton parts out. The third layer consists of two layers of blue organza, bonded with painted Bonda- web. After free zig-zag stitching with Whip-stitch I have treated it with hot tool.
Fabric A:

Picture 91:
My red dyed fabric for the red waves was printed with silver acrylic by silk screen technic.
Fabric C:

Picture 92:
I am sewing my white wavy parts for the sea foam. From this pattern I have made two different technics. One on water soluble fabric and the other was done on a sheer organza and after stitching melted away.
Fabric D and E:

Picture 93:
This picture shows the hand stitching yarns I have chosen.

Picture 94:
This picture shows my stitch design for the wall hanging. Stitches and yarns I have used, which I selected:
1. Madeira Lana as bobbin thread, zig-zag whip stitch.
2. wool/ silk knitting yarn for the bigger knots.
3. hand dyed silk thread for the little knots.
4. green metallic thread for making an accent for the zig-zag machine stitch (hand stitched)
5. big zig-zag stitch between fabric A and B, silk thread.
6. metallic thread in seed stitch laying over the fabric B, which was stitched before with Pearl bobbin thread and after crunching. (7)
8. silver metallic for herringbone stitch.
9. rayon Madeira for making the sea foam.

Picture 95:
The presentation of the supporting work
The blue strips represent the blue clean water of our seas. The reflections are demonstrated by pieces of aluminium foils. The brown crunched strips symbolise polluted water. The red woven wavy strips are positioned between these two different facts (poluted and unpolluted water). The stitched zig-zag lines- as well machine and hand stitched- symbolise the conversation from whales and humans. The red wavy strips are so oriented, that you can visualise whales. The knots symbolise the water drops. The sea foam arises when water and air are mixed together. Protein polluted water produces also sea foam. The manipulated fabric for the strips are made separately and attached down to a backing fabric such as callico. These strips are secured on the background fabric with invisible, tiny stitches and the hand stitching part was done after this process thereby the fixation was increased. I have used for my hanging method a wooden stick with visable machine stitching loops. For the finishing edges I have chosen a simple turned hem.


Picture 96 and 97:
My wall hanging based on polluted and unpolluted water with conversation.
Chapter 12:
Study three artists:
- Jean Maries:
She is a well respected textile artist. She has explored several methods to make from paper technics translations into fabrics and stitched works. About these technics she wrote a book. She also gives online workshops. The connection from her work to this module is the interpreting and manipulating of designs inspired from the nature to a personal art.
- Barbara Lee Smith:
She is also a famous artist. Her personal feature is the use of one material, an industrial grade polyester non -woven fabric. She also wrote books about her technic. She is also inspired by nature. She works in a free manner, paints her material and manipulates it in several ways. Each finished piece attaches to a wooden frame, which is mounted behind her work to keep it away from the wall.
- Maggie Grey
My third chosen artist is Maggie Grey, she is a highly experienced teacher. She published a lot of textile books. The connection to module six is, that she works with dissolving and washing away. melting and distorting fabrics. She works with machine and also with hand stitching in combination. As many artists she is inspired by nature. She is very famous for her innovative mixed media ideas and technics. In order to consider the copy right I can not present pictures from these three artists.
Evaluation of completed work:
The embroidered piece for module 6 is an imaginary story of water, water pollution, conversation based on a paper design.
- Do you feel satisfied with the result?
It was difficult for me to keep to my paper design and manipulated papers. I had to make the connection between my papers and fabrics visible. I felt a little bit restricted. I am quite satisfied with my result.
- Is it fit for its purpose?
I think so, the transposition of my story is clear.
- If you were asked to make it again......?
I would use one of my other designs because I do not want to make the same design twice.
- Costing of the materials:
for papers, paints, glues, different fabrics, threads and yarns: about 40,00 Euro. The most of these materials are from my stash.
- My work samples are between layers of tissue paper in a box.
- Health and safety rules were observed. The most part of these works were done outside.
- Timing:
I started with the download on the 15.07.2014 and completed this module on the 16.11.2014. In this time I did the design work and embroidery work. I needed for this 67 hours not included is the time for reading, research and uploading on my blog.


